As a solopreneur, your most valuable asset is also your biggest bottleneck: your time. You’ve likely hit that invisible ceiling where your calendar is packed, your energy is depleted, but your revenue has plateaued because you can’t physically trade any more hours for dollars. You’re stuck in the "hustle trap"—constantly performing the same manual tasks, answering the same questions, and starting from zero every single month.
The dream was freedom, but the reality is a job you can't walk away from. To break free, you need to stop selling your labor and start selling your expertise through a scalable digital asset. GoHighLevel’s Memberships and Courses feature is designed to do exactly that, allowing you to package your knowledge once and sell it indefinitely.
The Features: Your Digital Content Infrastructure
The GoHighLevel (GHL) Memberships area is a robust, all-in-one hosting platform designed to turn your knowledge into a structured digital asset. Unlike external platforms, it lives natively inside your CRM. Here are some of the features that we will take a look at:
- Hierarchical Product Builder: Organizes content into Products (the course), Categories (the modules), and Lessons (the teaching units).
- Native Video Hosting: Securely hosts your training videos without the need for public links or expensive third-party video players.
- Drip Content Scheduling: Allows you to "gate" content so it unlocks over time (e.g., Week 1, Week 2), preventing students from feeling overwhelmed during your course.
- Customizable Themes: Use drag-and-drop design tools to brand your student portal with your specific logos, colors, and fonts. You would want to do this because it lets you make your course branded, which you should always try to show branding wherever possible.
- Automated Granting System: Direct integration with GHL Workflows to unlock access instantly upon payment. Set up workflows as needed to automate your process.
The Benefits: Scaling Beyond Your Time
For the solopreneur, the shift from one-on-one services to digital products offers three primary advantages:
- Breaking the Revenue Ceiling: You can sell a course to 1,000 people as easily as you can sell it to one. Your income is no longer tied to the number of hours you have available in a day. Instead, it depends entirely on how many people you can get to buy your course.
- The Integration Edge: Because the portal is part of your CRM, you can track student progress. If a student stops logging in, GHL can automatically text them to offer support. This was something impossible with disconnected tools.
- Enhanced Authority: Owning a professional, branded membership site elevates your status from a "service provider" to an "authority" in your niche, justifying higher prices.
How-To-Use: Building and Launching Your Portal
Step 1: Architecting Your Knowledge
Before uploading content, you must create your structure. This is how you would go about creating that structure.
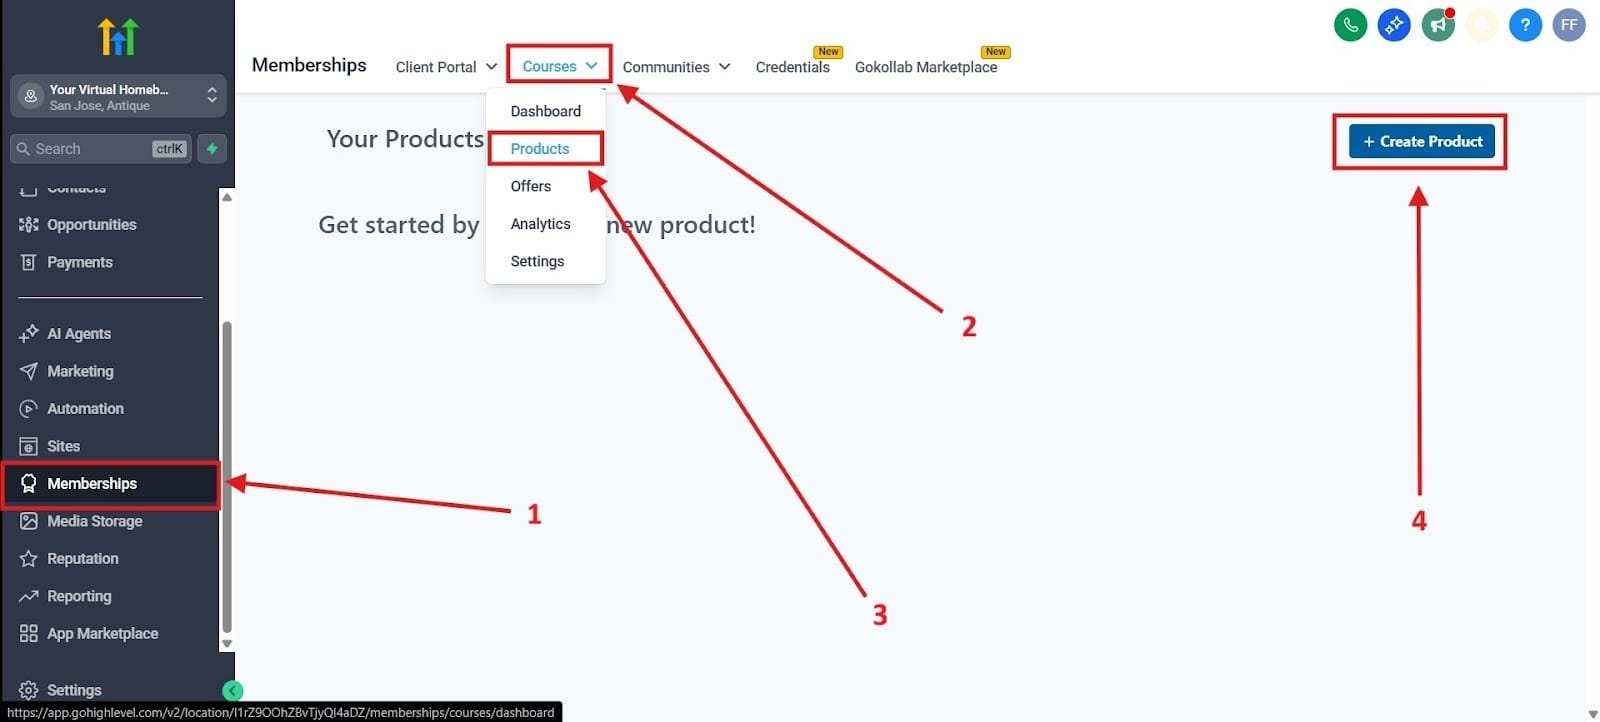
- Under Sites, navigate to Memberships on the left hand side, highlighted in red as number 1. Once you click the tab, you will want to go to Courses at the top under number 2 and under that tab, go to Products, highlighted in red as number 3. Click on the part that says Create a Product. This part has been highlighted in red as number 4.
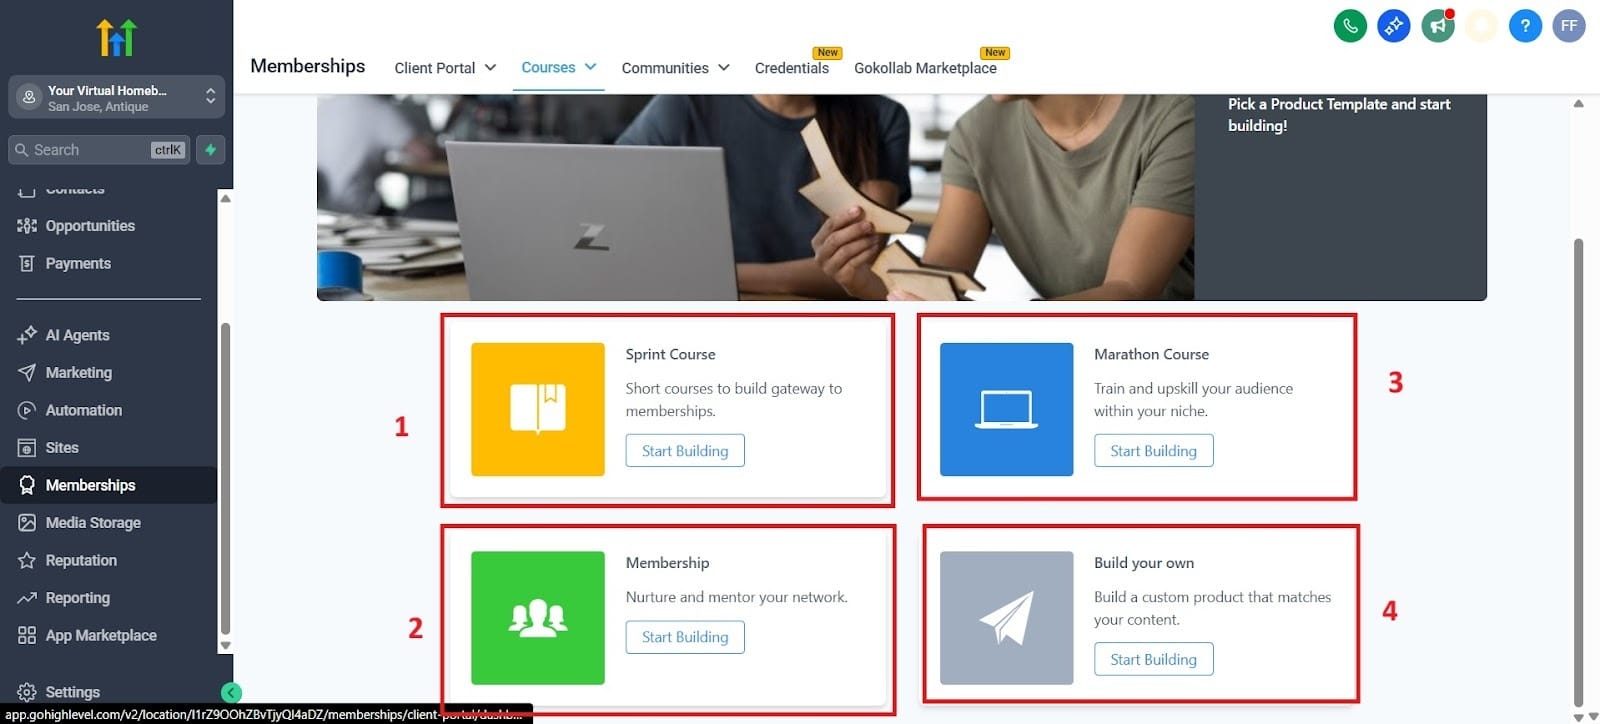
- After you click Create Product, choose a template. You have four options when it comes to choosing a course including Sprint Course, Marathon Course, Membership, and Build Your Own. I highlighted each of them in their own red box.
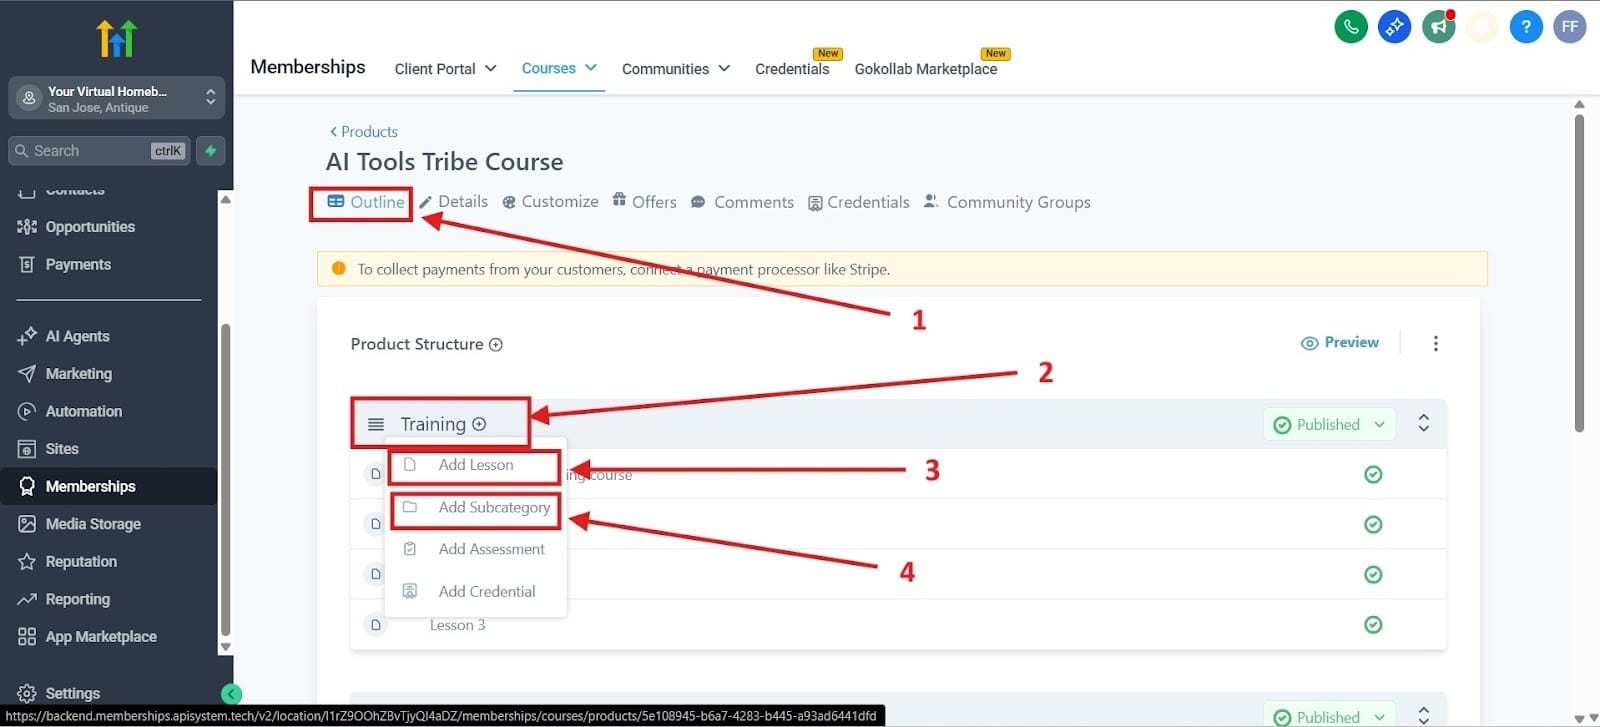
- Create your Categories (Chapters) and then add Lessons (Videos/Text) within them. Highlighted in red box number one is how you get the outline for your course. Red box number 2 shows you the module holding the individual lessons. For red box number 3, this is where you can add a lesson. Red box number 4 shows you how to add a subcategory to the course.
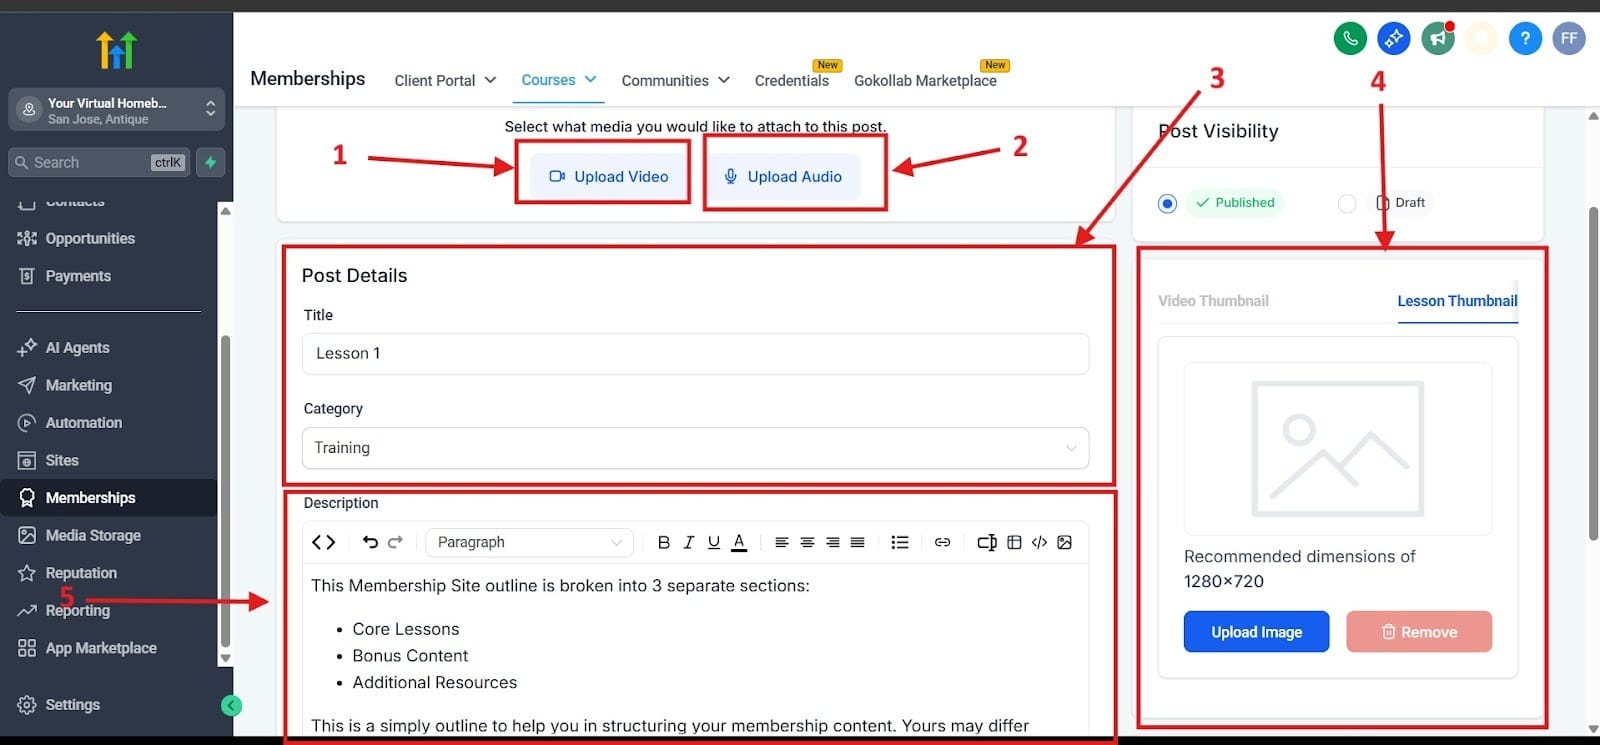
You can also click into a lesson. I highlighted in red box number one how you would upload a video. In red box number 2, you can upload audio. Mixing up your material keeps it interesting for those doing the course. Videos can be interesting, for example, but giving a good mixture of materials makes it feel like a real course.
Red box number 3 highlights the post title and the category. For red box number 4, you can choose a thumbnail by uploading an image. Finally, red box number 5 is the description for this lesson.
Step 2: Branding the Student Experience
Ensure the portal feels like your brand.
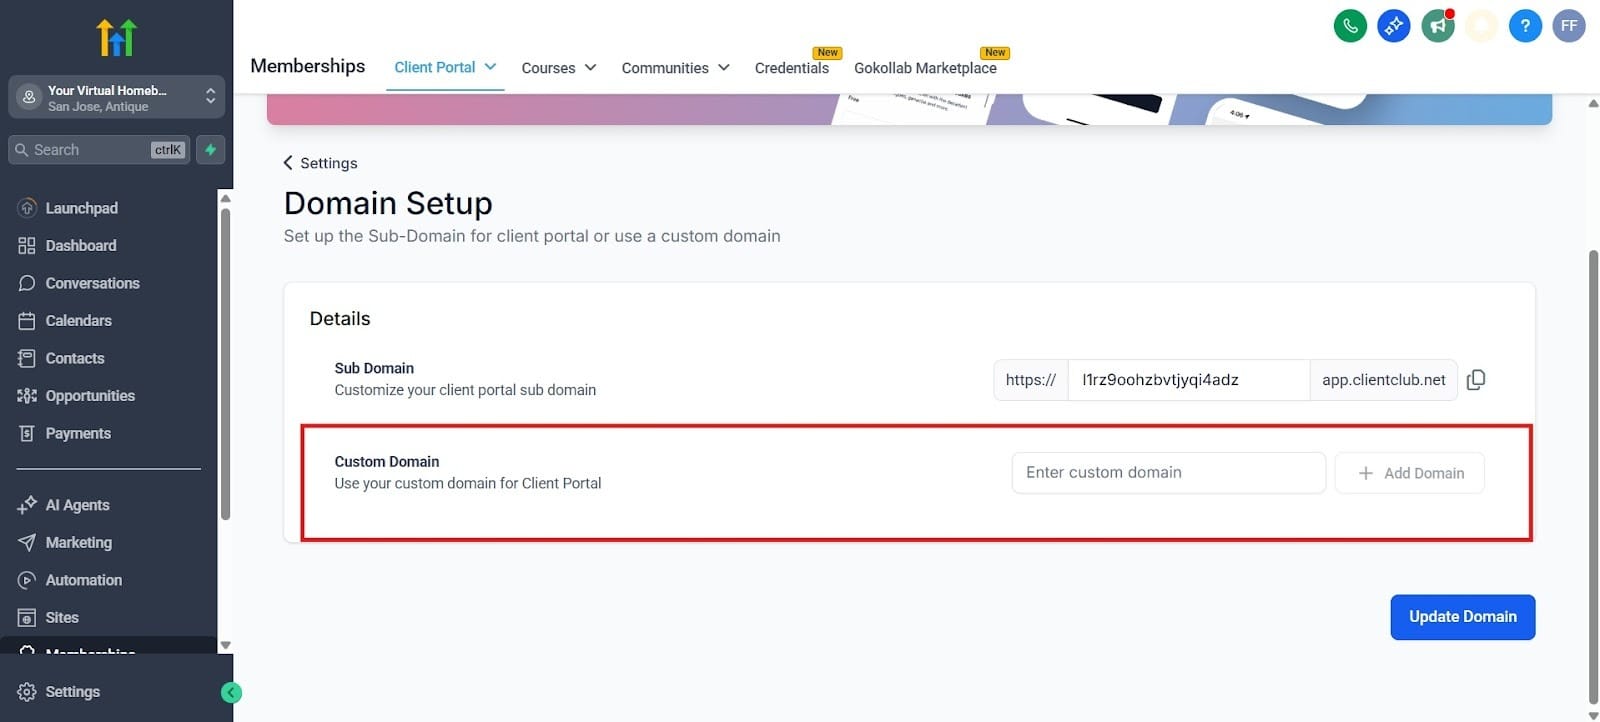
- Go to Settings > Domain Setup > Custom Domains to link your course to a branded URL (e.g., members.yourbrand.com). I highlighted this in the red box. You will want to choose an URL that would make it easy to distinguish your brand.
- Go to Build > Themes and select a layout.
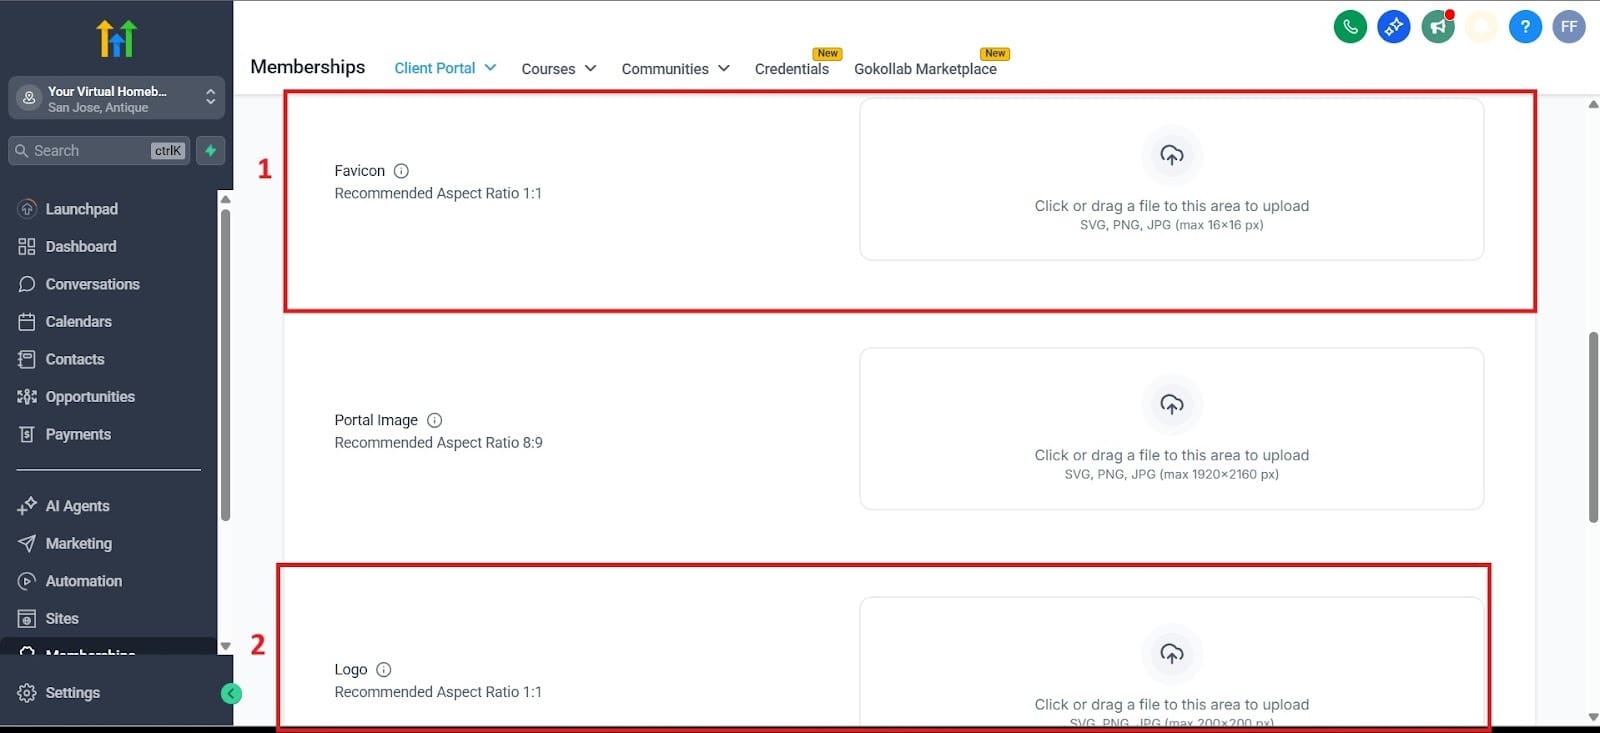
- Upload your Logo and Favicon in the branding settings to ensure a seamless transition from your website. The one highlighted in red as number 1 is the Favicon. The favicon is an image that you would see as the icon on your tab. The one highlighted in red as number 2 is the Logo, where you can upload that section.
Step 3: Automating the Enrollment (The Hands-Off Sale)
This is where the CRM and Membership area talk to each other.
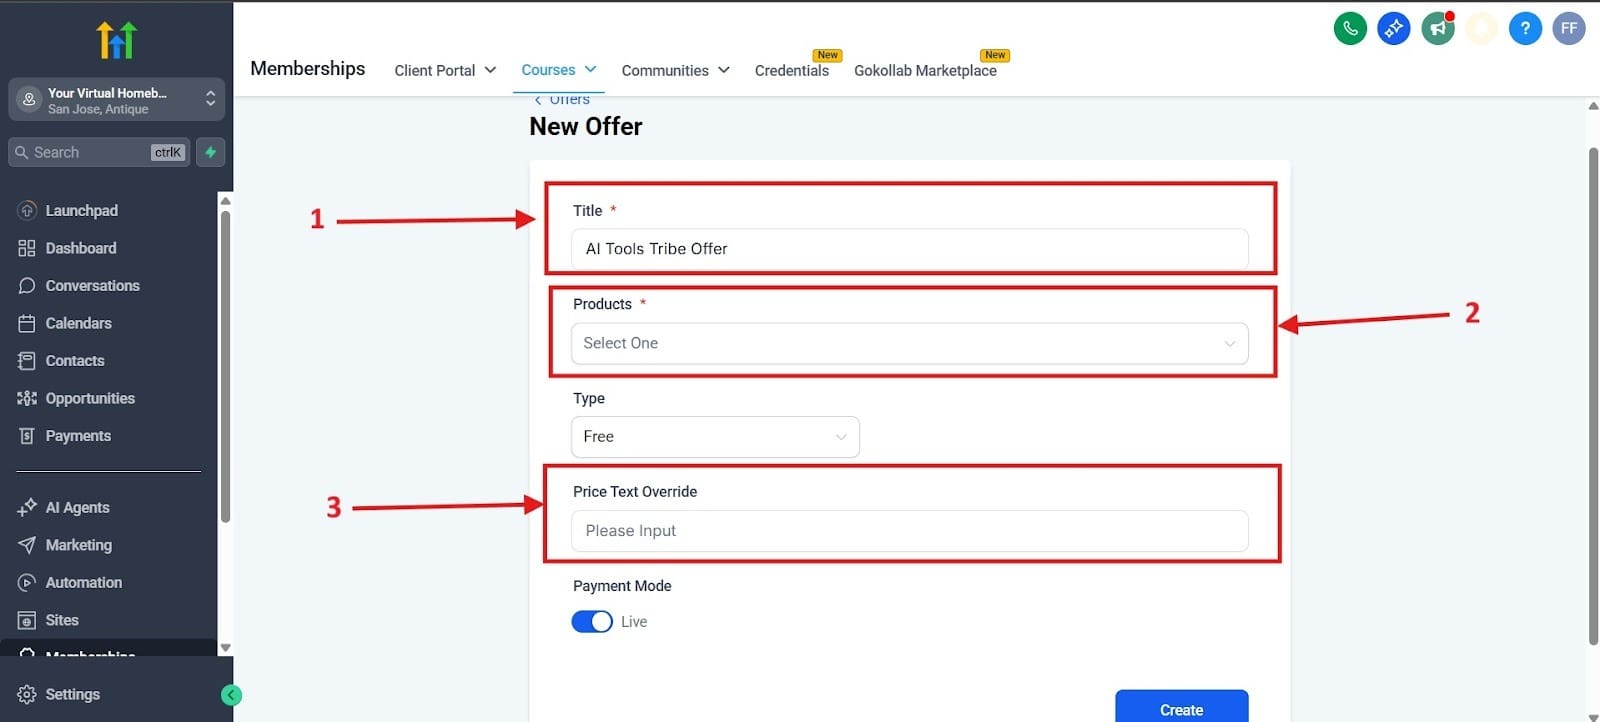
- Create an Offer in the Memberships tab and link it to your Product. Highlighted in red box number one is where you could set up the title of your offer. In red box number 2, you choose the course that you want to link the offer to. In red box number 3, you can change the default price text that you might see on the price button. For example, you could set it to “Only $100/month!”
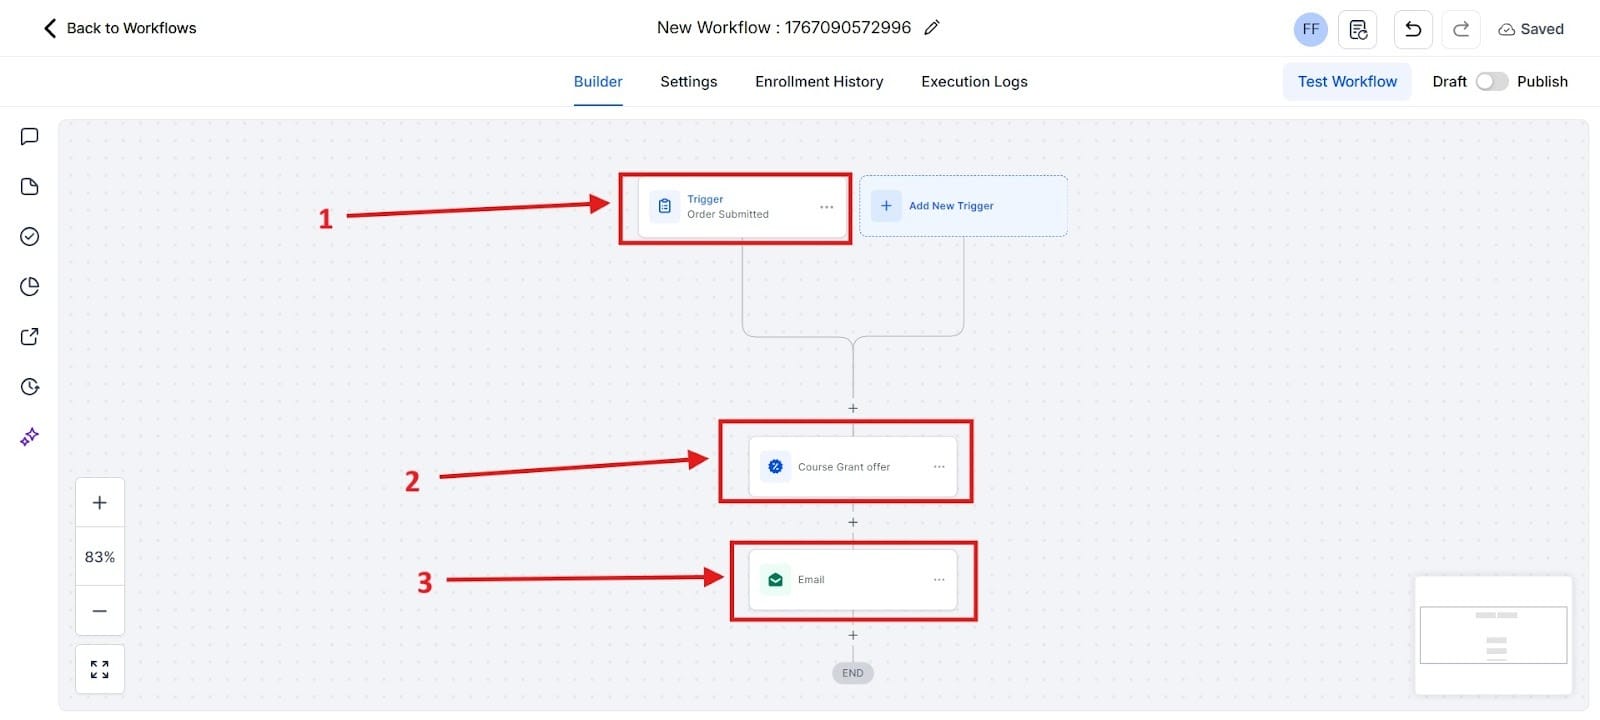
- First, go to Automation, found on the left hand menu. Create a Workflow with the trigger: Order Submitted (on your sales funnel). To do this successfully, you will need to make sure that you published your offer. One problem I had with finding it immediately was that I still had it in draft mode. Check to see that you have it set to Published.
- Add the action: Membership Grant Offer and select the offer you created.
- Add the action: Send Email to deliver their auto-generated login credentials.
I highlighted in red box number one the trigger for what happens once your customer submits the order for your course. After they submit the order, it will proceed to red box number 2 where you will see the course grant offer. Below that is red box number 3 where the email will be submitted. You will want to fill out the details for what the email will say for your course.
Step 4: Tracking Progress and Retention
Use analytics to keep students engaged.
- Navigate to Analytics > Product Post to see which lessons have the highest completion rates.
- Set up a "Nudge" Workflow: If a contact has the tag Active Student but hasn't logged in for 7 days, trigger an automated SMS to check in on them.
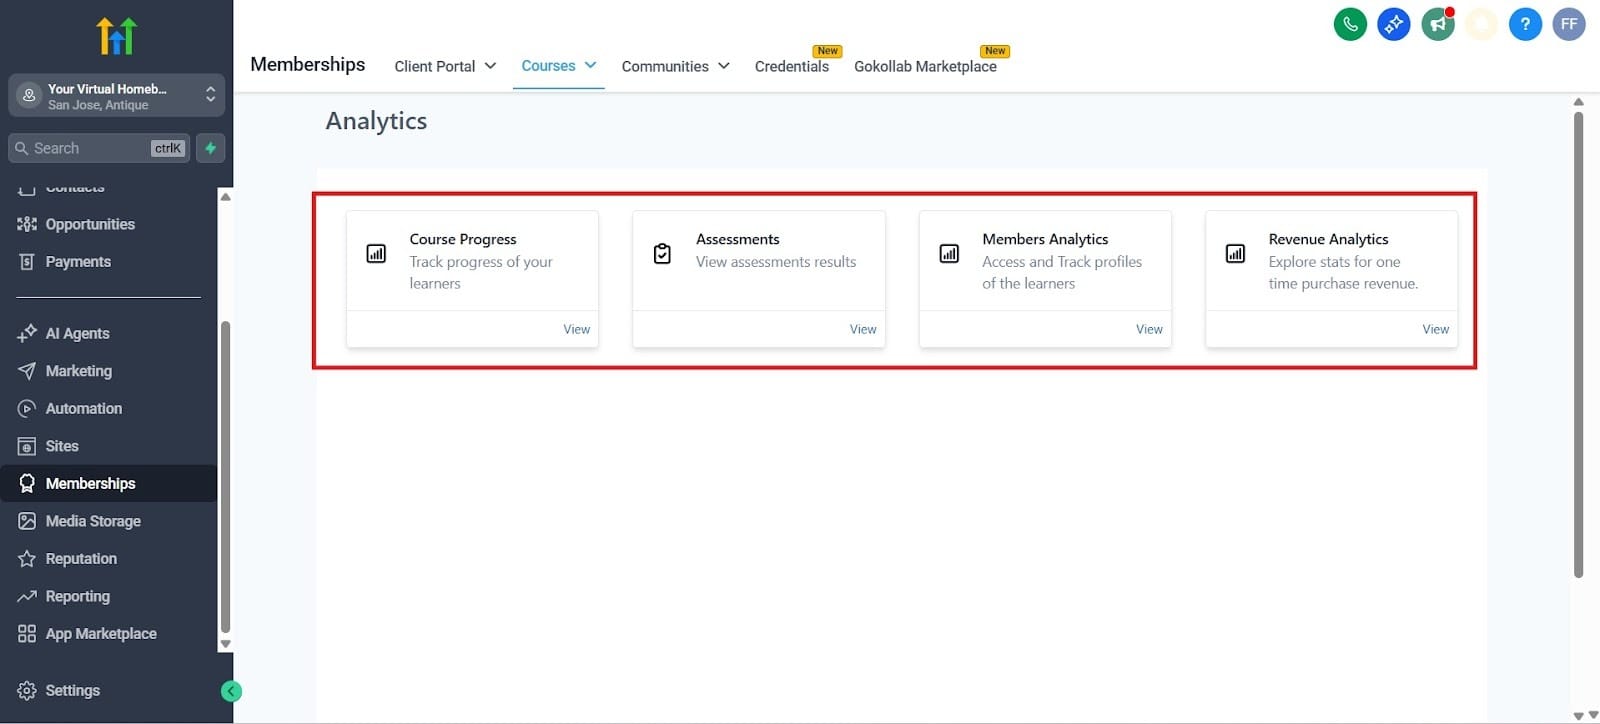
I highlighted in the red box the section for where you can choose from all the different analytics. If you want to see the students’ progress, you should head over to the first box titled Course Progress. The second box lets you view your assessment results. The third box lets you take a look at all the members for your course and lets you access and track their profiles. Finally, you have the revenue box where you can look at the total amount of revenue that you have made from each course.
Your 24/7 Revenue Engine
GHL Memberships transform your business from a manual labor model to a digital equity model. By leveraging the Product Hierarchy and Drip Features, you provide a high-value, professional experience.
The goal of the solopreneur is to own their time. By packaging your expertise into a GHL Membership, you aren't just selling a course. In fact, you are buying back your freedom. Now you will have the time to do the things you actually want to do.